User Manual MG3900

A primera vista
- Introducción general
- INFORMACIÓN IMPORTANTE
- Features (Fig. 1)
- Carga
- Uso del aparato
- Cómo cambiar accesorios
- Encendido y apagado del aparato
- Accesorios para la barba
- Tema nuevo (14)
- Accesorios para la cabeza
- Attachments for use on body
- Accesorios para la cara
- Limpieza
- Almacenamiento
- Soporte
- Solicitud de accesorios
- Reciclaje
Enhorabuena por la adquisición de este producto, y bienvenido a Philips. Para sacar el mayor partido a la asistencia que Philips le ofrece, registre el producto en www.philips.com/welcome.
Puede encontrar el número de modelo en la parte posterior del producto.
El número de modelo completo (p. ej. MG1234/56) se encuentra en la base del envase, en su recibo o en la confirmación del pedido.
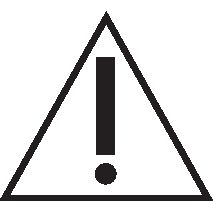
Never rinse the handle under the tap or immerse it in water. Only the cutting element and the attachments can be rinsed under the tap when detached from the handle.
Getting the handle wet may cause irreversible damage to your appliance. This will result in the appliance becoming unusable.
Este aparato solo puede utilizarse sin cable.
Apague el aparato antes de desconectar o conectar accesorios, así como antes de la limpieza.
Limpie siempre el aparato después de usarlo.

Recortador de pelo de nariz y orejas
Elemento de corte
Botón de encendido/apagado
Indicador de carga
Toma para clavija pequeña
Cable USB
Note:The power source is not included. En www.philips.com/support puede obtener una fuente de alimentación adecuada (p. ej., Philips HQ87).
Cepillo de limpieza
Stubble comb 1 mm
Stubble comb 2 mm (only with models MG3930, MG3935, MG3940, MG3945, MG3946)
Beard comb 3 mm (only with models MG3915, MG3920)
Beard comb 5 mm (only with models MG3915, MG3920)
Beard comb 7 mm (only with model MG3920)
Peine-guía ajustable 3 mm – 7 mm (only with models MG3930, MG3935, MG3940, MG3945, MG3946)
Peine para el cabello 9 mm (only with models MG3935, MG3945)
Peine para el cabello 12 mm (only with models MG3915, MG3920, MG3930, MG3940, MG3945, MG3946)
Peine para el cabello 16 mm (only with models MG3930, MG3940, MG3946)
Peine-guía para el cuerpo 3 mm (only with models MG3935, MG3940, MG3945, MG3946)
Intimate comb 1 mm (only with models MG3945, MG3946)
Not shown:pouch
Precaución
Cargar o utilizar el aparato a temperaturas inferiores a 10 °C o superiores a 35 °C afecta negativamente a la vida útil de la batería.
Si el aparato sufre un cambio brusco de temperatura, presión o humedad, deja que se temple durante 30 minutos antes de utilizarlo.
The USB supply unit is not included. To safely charge your product, only use a certified supply unit with output rating 5 V, ≥ 1.
Charge the appliance before first use and when the motor starts working more slowly.
Model number | Time to full charge | Run time |
|---|---|---|
MG3915, MG3920, MG3930 | 8 hrs | 60 min |
MG3935, MG3940 | 8 hrs | 70 min |
MG3945, MG3946 | 4 hrs | 90 min |
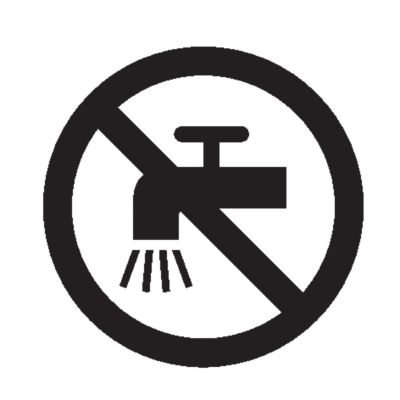
Advertencia: Keep the USB cable and the USB supply unit dry.
Make sure the appliance is switched off.
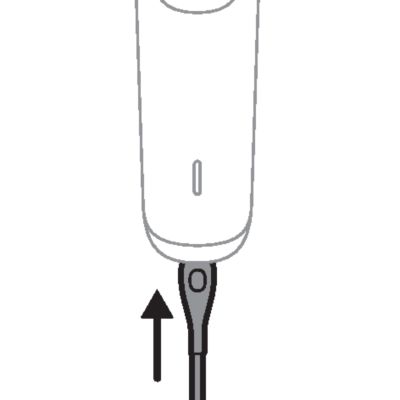
Inserte el conector pequeño del cable USB en la toma de corriente de la parte inferior del aparato.
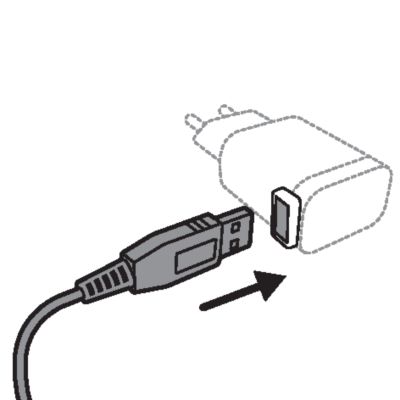
Insert the USB plug into the USB supply unit (not provided).
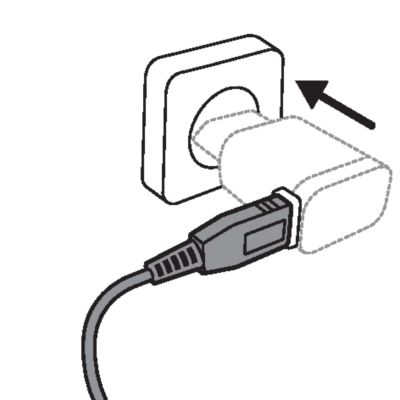
Insert the USB supply unit into the wall socket.
After charging, remove the USB supply unit from the wall socket and pull the small plug out of the appliance.
Always check the product and all accessories before you use it. Do not use the product or any accessory if it is damaged, as this may cause injury. Always replace a damaged part with one of the original type.
Because of hygiene, only one person should use the product.
Tema nuevo (54)
Consejos para recortar
Cuando corte por primera vez, empiece con la posición máxima de longitud de corte para familiarizarse con el aparato.
Puesto que no todo el vello crece en la misma dirección, puede probar diferentes direcciones de corte (es decir, hacia arriba, hacia abajo o en diagonal). Practique para obtener mejores resultados.
Realice movimientos suaves y lentos en todo momento y asegúrese de que la superficie del peine esté siempre en contacto con la piel.
Para obtener los mejores resultados use el aparato sobre vello limpio y seco, ya que el vello húmedo tiende a pegarse al cuerpo.
Si se acumula demasiado vello en el aparato, límpialo antes o durante el uso para obtener el mejor resultado de corte posible.
Desconexión y conexión de elementos de corte
Empujar suavemente hacia arriba
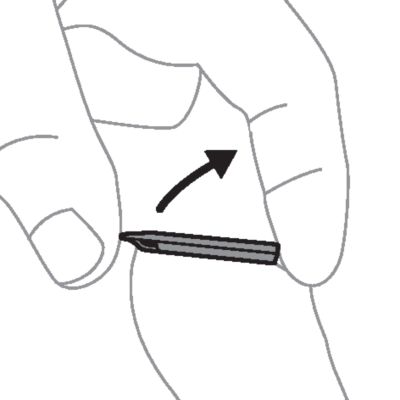
Para desmontar un elemento de corte, pon el pulgar debajo de los dientes del elemento de corte y empuja suavemente hacia arriba hasta que se suelte del mango.
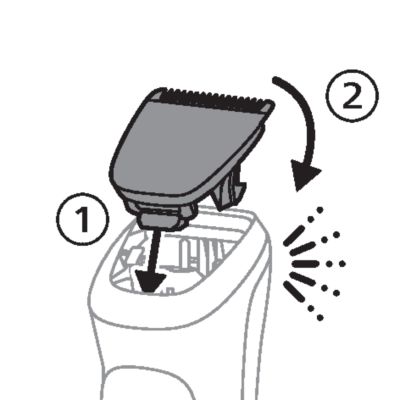
Empuje los dientes hacia abajo.
Para colocar un elemento de corte, inserta la ranura de plástico de la parte posterior del elemento de corte en la ranura de guía del mango. A continuación, presiona suavemente los dientes del elemento de corte hacia abajo hasta que el elemento de corte encaje en su sitio con un clic.
Detaching the nose and ear hair trimmer
Place your finger on the recess at the back of the attachment and push the attachment off the handle. Use your other hand to prevent the attachment from dropping on the floor.
Detaching and attaching guards
To attach any type of comb onto the cutting element,slide the front part of the comb onto the teeth and press the notch at the back of the comb downwards until it clicks into place.
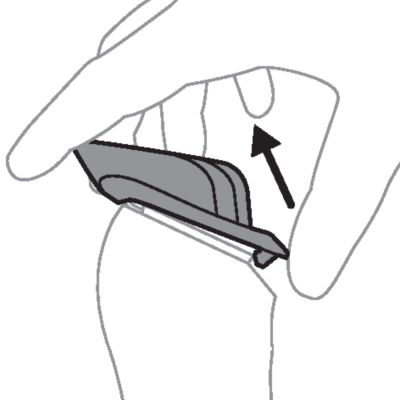
To detach any type of comb from the cutting element, carefully push its back part off the appliance and then slide it off the cutting element.

Para encender o apagar el aparato, pulse el botón de encendido/apagado una vez.
Consejo
Antes de comenzar a cortar, peine la barba o el bigote con un peine fino.
Beard guards MG7790, MG7750, MG 5790, MG5760, MG5750
Use a stubble or beard comb attached to the cutting element to trim your beard and mustache evenly. The numbers on the combs relate to the number of millimeters of hair length that will remain after trimming.
Attach a stubble or beard comb to the cutting element.
To trim in the most effective way, move the comb against the direction of hair growth. Make sure that the surface of the comb always stays in contact with the skin.
Apague y limpie el aparato después de cada uso.
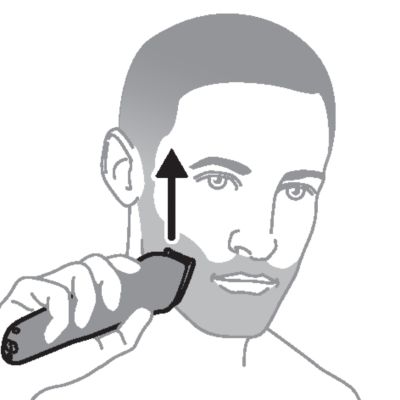
Full-size hair trimmer
Use the cutting element without any comb to trim hair close to the skin (to a length of ca. 0.5 mm) or to create clean lines around your beard, neck and sideburns.
To trim hair close to the skin, place the flat side of the cutting element against your skin and make strokes against the direction of hair growth.
For contouring, hold the cutting element perpendicular to the skin and move it upwards or downwards with gentle pressure.
Apague y limpie el aparato después de cada uso.
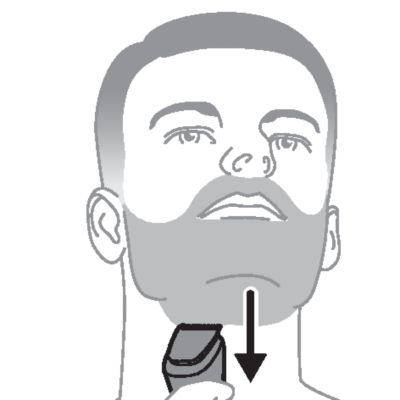
Use the adjustable beard and hair comb to trim your beard or scalp hair evenly to the desired length. The hair length settings range from 3 mm to 7 mm and relate to the number of millimeters of hair length that will remain after trimming.
Attach the adjustable beard and hair comb to the cutting element.
Use the slide switch on the comb to adjust the length.
Para cortar de la forma más eficaz, mueva el peine-guía en dirección contraria a la del crecimiento del pelo. Asegúrese de que la superficie del peine esté siempre en contacto con la piel.
Apague y limpie el aparato después de cada uso.

Consejos para cortar el pelo
Peine siempre el cabello antes de empezar a recortarlo.
Para obtener un mejor resultado, utilice el aparato solo sobre pelo limpio y seco.
Hair guards
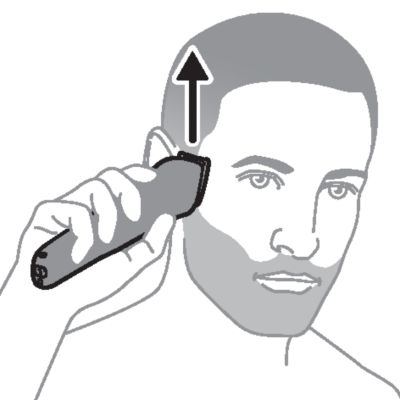
Use a hair comb attached to the cutting element to evenly trim the hairs on your head.The numbers on the combs relate to the number of millimeters of hair length that will remain after trimming.
Attach a hair comb to the cutting element.
Move the appliance slowly over the crown from different directions to achieve an even result. Always move the appliance against the direction of hair growth. Press lightly. Make sure that the surface of the comb always stays in contact with the skin.
Make overlapping passes over the head to ensure that all hair that should be cut has been cut.
Sacuda suavemente los pelos del aparato entre pasadas para evitar que se acumulen entre el elemento de corte y el peine.
Apague y limpie el aparato después de cada uso.
Importante
Utilice siempre un peine-guía para el cuerpo cuando recorte zonas sensibles.
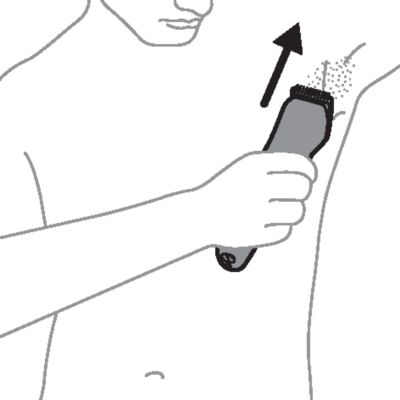
Attach the intimate comb to the cutting element to trim hair on sensitive body areas (such as your intimate area, armpits or chest) to a short length (1 mm), for extra skin protection.
Attach the intimate comb to the cutting element.
If possible, stretch a small area of the skin with two fingers to make the hairs stand upright.
Place the flat side of the cutting element against your skin and make strokes against the direction of hair growth. Asegúrese de que la superficie del peine esté siempre en contacto con la piel.
Apague y limpie el aparato después de cada uso.
Body combs MG7750
Attach the body comb to the cutting element to trim hairs below the neckline to the length of 3 mm.

Nose trimmer
Use the nose and ear hair trimmer to trim your nose and/or ear hair.
Make sure nasal passages are clean. Make sure outer ear channels are clean and free from wax.
Do not insert the cutting element too deep into your nostrils or ear channels (max. 5 mm).
When trimming both nose and ear hair, make firm, rotary movements to ensure that the cutting element reaches all the hairs.
Clean the nose and ear hair trimmer after each use.
Nota: El recortador de pelo de nariz y orejas no está diseñado para eliminar el pelo de esas zonas sino para rebajar su longitud. El pelo de la nariz y las orejas tiene una importante función de protección, y no se debe eliminar totalmente.
Trimming nose hair
Gently insert the cutting element into one of the nostrils. Move the tip in and out of the nostril in a firm, rotary motion to cut the hairs to a shorter length.
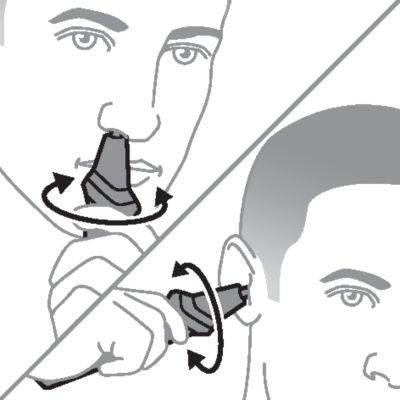
Trimming ear hair
Slowly move the cutting element along the outer ear to trim hairs that stick out beyond the rim.
Gently insert the cutting element into the outer ear canal. Move the tip in and out of the outer ear canal in a firm, rotary motion to cut the hairs to a shorter length.
Switch off and clean the product after each use.
Never rinse the handle under the tap or immerse it in water. Only the cutting element and the attachments can be rinsed under the tap when detached from the handle.
Apague el aparato antes de desconectar o conectar accesorios, así como antes de la limpieza.
Only use cold or lukewarm water to clean the cutting element and the attachments.
No utilice nunca aire comprimido, estropajos, agentes de limpieza abrasivos ni líquidos agresivos, como gasolina o acetona, para limpiar el aparato.
No seques nunca el elemento de corte con una toalla ni con un paño, ya que se pueden enganchar en los dientes y provocar daños.
Make sure that the appliance is switched off and that the USB power source has been removed from the power outlet and from the appliance.
Wipe the handle with a dry cloth.
Cleaning with brush
Detach any comb from the appliance and clean it with the cleaning brush.
Detach the cutting element from the appliance. Clean the teeth and the inside of the cutting element with the cleaning brush.
Clean the inside of the hair chamber with the cleaning brush.
Keep the handle away from water. Make sure that no water reaches the inside of the hair chamber.
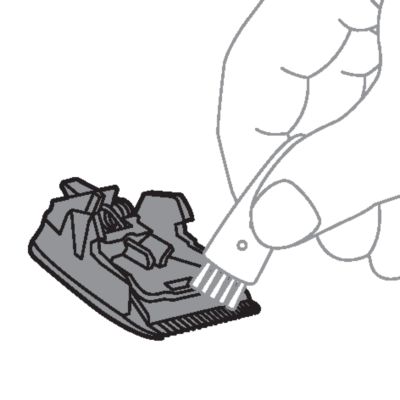
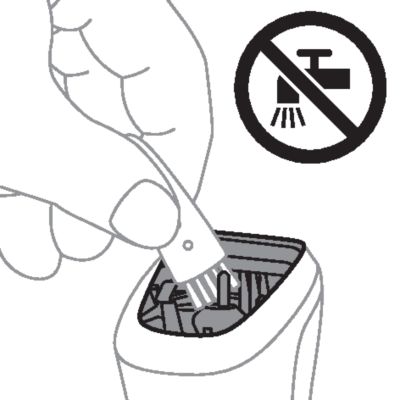
Cleaning attachments under the tap
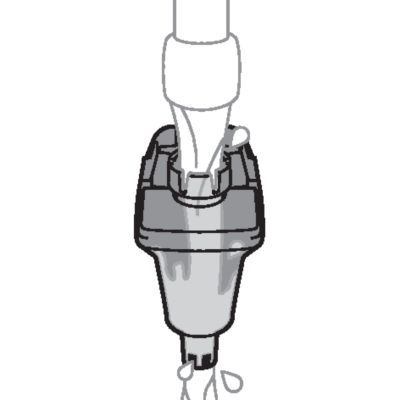
Detach any comb and the cutting element from the appliance and rinse them under the tap.
Carefully shake off excess water and let the parts air-dry completely before reattaching them to the appliance.
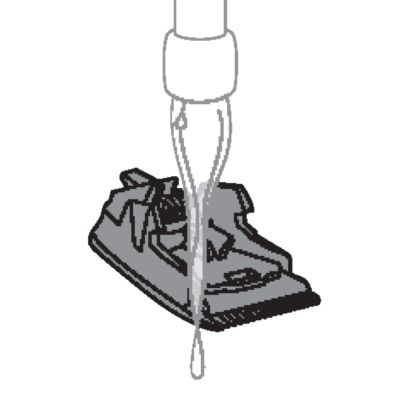

Cleaning the nose and ear hair trimmer
Clean the nose and ear hair trimmer immediately after use and when a lot of hair or dirt has accumulated on the cutting element.
Detach the nose and ear hair trimmer from the product.
Rinse the nose and ear hair trimmer head under running tap water.
For a thorough clean, immerse the nose and ear hair trimmer head in a bowl with warm water for a few minutes to soak and soften the debris. Then rinse the nose and ear trimmer head under running tap water to remove stubborn debris.
Carefully shake off excess water and let all parts air-dry completely before reattaching them to the product.
Nota: No coloque ni guarde el aparato en lugares desde donde pueda caer a una bañera o lavabo, al agua u otro líquido mientras está enchufado.
Asegúrese de que el aparato esté apagado y de que la fuente de alimentación USB esté desconectada la toma de corriente y del aparato.
Al guardarlo, no enrolle el cable USB alrededor del aparato.
Store the appliance, the USB power source and all the accessories in the pouch supplied, if provided with your appliance. Attach a comb to the cutting element to protect the teeth during storage.
Place the pouch in a safe, dry location, where it will not be crushed, banged, or subject to damage.
Make sure that the appliance and the accessories are dry before you place them in the pouch.
Para obtener asistencia para cualquier producto, información sobre el consumo de energía y la Declaración de conformidad de la UE, visite www.philips.com/support.
Las unidades de corte no están cubiertas por los términos de la garantía internacional debido a que están sujetas a desgaste.
Para comprar accesorios o piezas de repuesto, visite www.philips.com/parts-and-accessories o acuda a su distribuidor de Philips. También puede ponerse en contacto con el Servicio de Atención al Consumidor de Philips en su país (consulte los datos de contacto en el folleto de la garantía internacional).
Este símbolo significa que los productos eléctricos y las baterías no se deben eliminar como residuos domésticos corrientes sin clasificar.
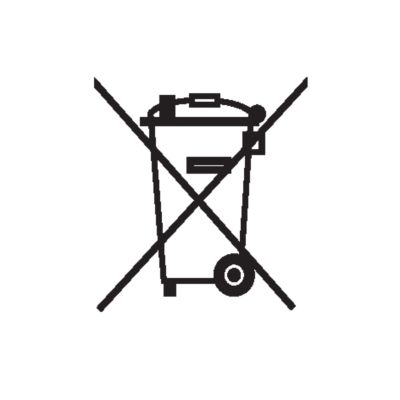
Siga la normativa de su país sobre recolección selectiva de productos eléctricos y baterías.
Soporte de Philips
¿Tu producto no funciona como debería?
Soporte de Philips
¿Quieres saber más sobre tu producto?